I really didn’t expect this to be so easy, that it will be covered in a single post, but it actually is, so here we go.
Overview
It turns out to boot linux on a device you don’t need much. To be more specific you need to specify the following DT nodes:
cpu– number of cpus, clustering, cache;memory– amount and location of available memoryreserved-memory– locations of memory that the kernel should stay out oftimer– provide a mechanism for kernel to wake itself up (via interrupt) after some time. Here is a nice short overview of what a hardware timer does;interrupt-controller– handle interrupts from peripherals (the timer in the simplest case).
The thing to understand about device-trees, is that the format is a simple JSON-like tree, but the property names, and allowed values have strict meaning, defined for each individual node. Reading these property specifications is crucial in writing a proper device-tree. They are called device tree bindings or dt-bindings, and you can find them all under Documentation/devicetree/bindings/ directory. Just search for the compatible string in each node.
So the general idea is to source your data from these three places
- downstream DT file — provides the raw data for the DT properties. Sometimes the compat string is different, or the property name is different, or the format of the value is different, but it is still a good starting point. Keep in mind the device is intended to run with those settings, so they are generally not entirely wrong 🙂
- dt-bindings — the currently available device tree compat strings and property specifications. You might need to tweak the downstream DT to match the mainline dt-bindings
- similar mainline DT file — it is good to have a working example of a similar device (or even better — devices), to gain inspiration from. In certain occasions the dt-bindings are not very clear, or not 100% correct. You can resort to reading driver source code, but an easier first step is to look around another DT file
- driver source code — hopefully you won’t need to do this right away, but keep in mind that code is kind, i.e it’s executable self-documentation 🙂 If you search for the compat string under
drivers/and rare cases underarch/you’ll find the piece of code that handles the particular device, and in particular what it does with DT properties
The good news is that all those essential nodes are present in the stock/downstream DT, so you just need to locate them and copy them over. A few properties here and there should be removed/renamed, by looking at dt-bindings and other similar boards.
Getting feedback
As you might recall from last post, getting a reliable feedback from your device is essential when porting. Last time basically crashing the device was enough feedback to track the issue down. That is still an option — if you put a kernel panic manually in the source code you can check if a particular place is reached or not.
There are easier ways to get feedback, so we’ll try to use them. These are pstore (or ramoops) and simple-framebuffer.
Pstore/ramoops
pstore is a mechanism for kernel to write stuff to a place that survives reboot. The idea being, if you get a kernel panic, you can write some dmesg, and stack trace to this place, and then read it back on next boot. A working downstream kernel + initfs that gives us a root shell is an excellent way to read pstore logs. That is why I spend the time to make sure pmos with downstream kernel boots to initfs with telnet shell. You can probably use a rooted Android, but there are a million things happening there not under control, who knows if somebody from google decided to be helpful by copying out the pstore logs to some more secure location and erasing them (so that new pstore logs could be written).
Conveniently there is a ramoops node in the downstream DT, so you can pretty much reuse it as is. Mainline compat string is ramoops as well.
Simple Framebuffer
Most devices boot with their screen on, and when control is passed from bootloader (not under our control) to kernel, the screen stays on. Very often there is a reserved memory region, where each word (4 bytes) represents a pixel. So you can show stuff on screen by writing the right bytes in the right location in memory. You also don’t need complex panel driving hardware, or GPU or any of that, so the kernel can do that early on.
In order to setup simple-framebuffer (compat string), you need the start memory location, width, heigh and pixel-format (my device uses a8r8g8b8), which basically mean one byte per color per pixel. Even if you get some/most of the props wrong (other than memory start location :)), you’ll still see something on the screen, but it might be off.
So now the question is how to get the memory address. There are a few ways:
From bootloader
The code of the second stage bootloader is accessible in the XBL (or XBL_SEC or SBL on older devices), partition. So if you can get the binary contents of the partition (adb pull, or if that won’t work, get a root shell, dd/cp the partition, change permissions and then adb pull it), then run strings which extracts all null-terminated readable strings, and search for Display.
% # option 1 %adb pull /dev/block/bootdevice/by-name/xbl_a% # option 2 % adb shell dev$ su - dev# cp /dev/block/bootdevice/by-name/xbl_a /storage/self/primary dev# ls -ld /storage/self/primary # get user/group from here and reuse dev# chown XXX:YYY /storage/self/primary/xbl_a % adb pull /storage/self/primary/xbl_a % # end options %strings xbl_a | grep Display0x5C000000, 0x01000000, "Display Reserved", AddMem, MEM_RES, SYS_MEM_CAP, Reserv, WRITE_THROUGH_XN
From Device Tree
Search for ‘continuous splash’ (cont_splash) or ‘display rdump’ or some variation thereof inside the restricted memory regions under memory node. I have both:
cont_splash_memory: cont_splash_region@5c000000 {reg = <0x0 0x5c000000 0x0 0x00f00000>;label = "cont_splash_region";};disp_rdump_memory: disp_rdump_region@5c000000 {reg = <0x0 0x5c000000 0x0 0x00f00000>;label = "disp_rdump_region";};
Kernel module
To actually use simple-framebuffer you also need to enable the CONFIG_FB_SIMPLE kconfig option:
This driver assumes that the display hardware has been initialized
before the kernel boots, and the kernel will simply render to the
pre-allocated frame buffer surface.
In general, all compat strings in DT will need the corresponding driver enabled in Kconfig. Most of the blocks discussed in this page are already enabled, but the framebuffer is not. The general flow is you figure out which compat string you need, then you grep in drivers, and find (in this case): drivers/video/fbdev/simplefb.c, then you open the corresponding makefile: drivers/video/fbdev/Makefile, and then you see that simplefb.o is compiled based on the CONFIG_FB_SIMPLE flag. Then you open the corresponding Kconfig: drivers/video/fbdev/Kconfig to check for dependencies, description etc.
Roadblocks
wake-gic
To my surprise there weren’t that many roadblocks. One thing that put me off was that the main interrupt controller for the billie2 was not the main interrupt controller in the board, but a wake-gic (compat string qcom,mpm-gic). I event went on to boot android and read off /proc/interrupts which displays the number of interrupts received on each line, and the chip they originated from, and there was the wake-gic, signifying that it was in fact responsible for all the important (timer in this case) interrupts.
I was reading through the code of the wake-gic, and thankfully it wasn’t very long or very complicated. So I was preparing to port it, so I can properly wire up the device tree, but when I talked to Konrad, he said I could safely ignore this wake-gic, and instead wire stuff directly to the main gic (compat string arm,gic-v3 in my case). I wanted to believe him, but everything I knew about interrupt hierarchies told me otherwise.
So I devised the following test — replace the wake-gic in the downstream kernel with main gic, and see if it boots. And to my astonishment it did in fact boot! Not only that, now under /proc/interrupts you could see all the important interrupts being handled by gic instead! Apparently this wake-gic acts as some sort of middle-man, that has something to do with device wakeup/sleep, but is otherwise not essential to the interrupt operation. In any case it is good that we could test this theory in a sandbox, there are less things to worry about when stuff doesn’t work.
reserved-memory
This is not so much a roadblock, but a) a more detailed explanation on how to port those regions and b) a confession that I don’t really understand how this works.
So the general idea is that the kernel can use all the memory as it pleases (mostly to satisfy it’s dynamic memory allocation requests, both from kernel and userspace), but there are a small number of locations which have a special purpose and should not be touched (by regular memory allocations). Such a regions is for example the framebuffer region. If you use it for memory allocations the display will show the contents of memory you use to … store your passwords for example. Not catastrophic, but still pretty bad. So these regions are given to drivers, and the idea is that you can use it only if you know what you’re doing.
Some of the regions have a fixed start and length, in my stock DT they look like this:
removed_mem: removed_region@60000000 {
    compatible = "removed-dma-pool";
    no-map;
    reg = <0x0 0x60000000 0x0 0x3900000>;
};
And other regions have only a size and alignment:
user_contig_mem: user_contig_region {
     compatible = "shared-dma-pool";
     alloc-ranges = <0x0 0x00000000 0x0 0xffffffff>;
     reusable;
     alignment = <0x0 0x400000>;
     size = <0x0 0x1000000>;
 };
This second type of region is dynamically allocated by the kernel early on. You can check dmesg for messages like created DMA pool XXXX, size YYmb (or CMA pool). For now you can just fetch the start locations from dmesg, and the sizes from DT (for the second type of region, for the first type all is clear from DT), and stick them in reserved-memory region in your port.
The result
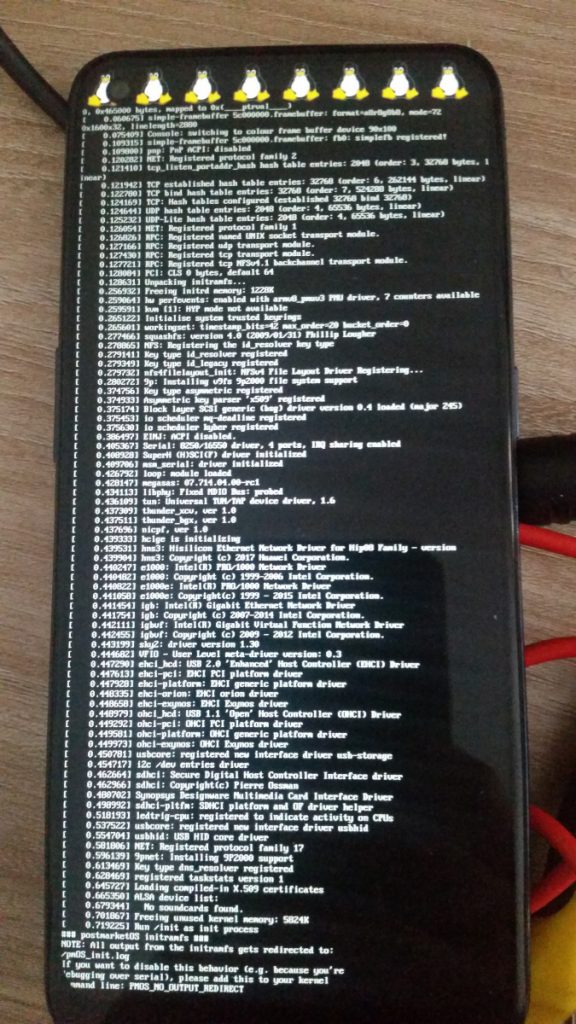
The kernel booted on the first try, and I could see some dmesg, and it even managed to run init. Of course USB is not working so I can’t telnet in, but we’ll tackle that next.
You can track progress at the billie2-ml branch: https://gitlab.com/ichernev/linux-postmarketos/-/tree/billie2-ml, I’ll do some cleaned up patches when I get more things working.
Reference
These are the initial SoC dtsi and Device dts files. You might be able to get it to boot with even less 🙂
Edits
- User
x0rzavisuggested the addition ofCONFIG_FB_SIMPLEnote, because it was not obvious from the article it is needed - Added initial soc/device DT files for easier reference (they’re still in the gitlab repo)